
Another fling released by VMware R&D team for NSX and who knows, it may become a feature in next version 🙂 and here are the details about this FLING. NSX is a very powerful network virtualization platform that allows the users to spin up large scale complex networks within seconds. For new users, the inventory-based interface that NSX exposes might be a little overwhelming. To ease the network creation process and the workloads’ attachment to such networks we present ‘Autopology’ – a graphical interface aimed to complement NSX and simplify workflows for customers and people stepping into the realm of virtual networking. Currently it only supports NSX-T(ransformers), so it’s not for everyone. I have high hopes that this is just the first step and that it will eventually land in the native NSX interface. Autopology requires the server component to be installed on a Linux machine in your datacenter and you can design / deploy the topologies using the Autopology’s web interface which connects to the Autopology server.
What Autopology Offers
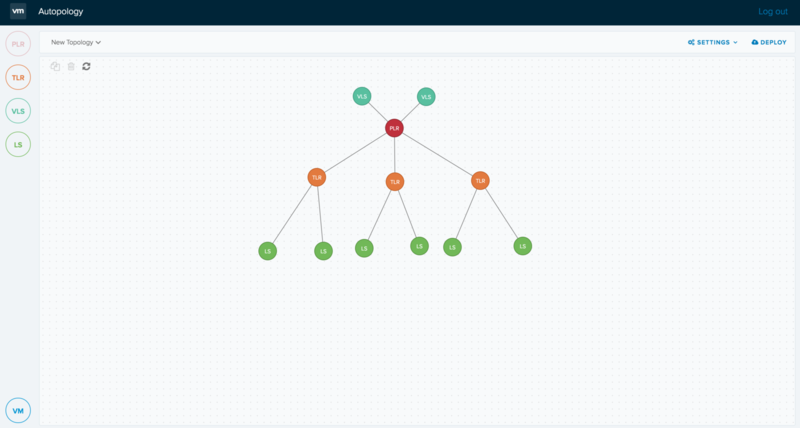
- Drag and drop interface to create logical networks so that the customers can design topologies tuned to their environments
- Single click replication of sections of topologies
- Ability to view the drawn network for future reference
- Ability to easily navigate to NSX Manager interface to further customize the logical entities as and when needed
- Ability to attach multiple VMs to logical entities. VMs could be residing on ESX or KVM hypervisors
Benefits
- One cohesive view to design logical networks as opposed to filling out tedious forms across multiple views
- Intelligent defaults help bypass advanced configuration for network objects
- Rapid scaling of logical networks
- Inventory of workloads across multiple hypervisors
- Combine compute and network in a single view
How to Install?
1) Download the autopology-1.0.20170421-py2-none-any.whl package from this page on the Ubuntu 16.04 machine
2) Install the package on Ubuntu 16.04 machine using the command
pip install autopology-1.0.20170427-py2-none-any.whl
l
3) Start Autopology Server using the command:
autopology.server
4) Follow the prompts to complete server startup
5) Post install, use the Autopology Web Interface URL, typically, https://<Ubuntu machine ip>:<port number> to design and deploy NSX topologies.
“Be social and share it with social media, if you feel worth sharing it”