
Nutanix Karbon is a curated turnkey offering that provides simplified provisioning and operations of K8 clusters. K8 is an open-source container orchestration system for deploying and managing container-based applications. Karbon leverages the CentOS and Ubuntu Linux-based operating systems for Karbon-enabled K8 cluster node creation. Linux containers provide the flexibility to deploy applications in different environments with consistent results.
The Karbon web console simplifies the deployment and management of Kubernetes clusters with a simple GUI and built-in event monitoring tools. Kibana, the built-in add-on, lets you filter and parse logs for systems, pods, and VMs. Karbon also leverages Pulse, Prism’s health-monitoring system, which interacts with Nutanix Support to expedite cluster issue resolutions. Enabling Karbon involves launching it through Prism Central and logging into Karbon to create clusters. Nutanix Karbon 0.8 is in Technical Preview and should not be used in a production environment.
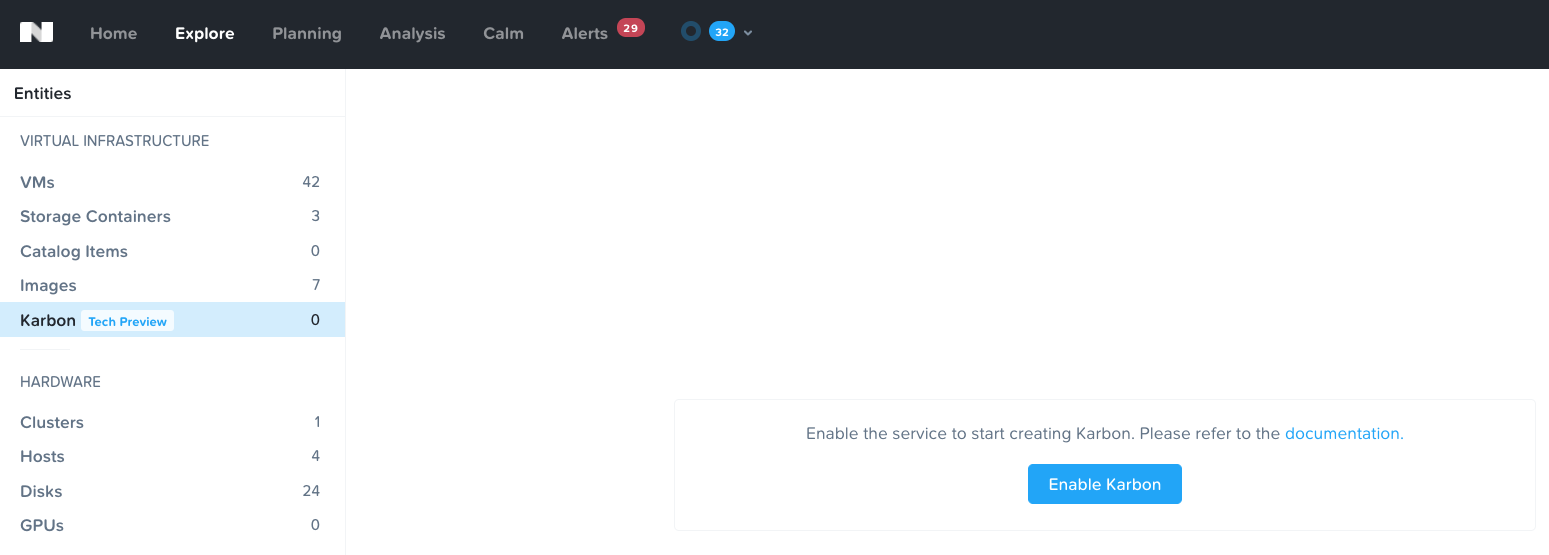
You can enable the Karbon feature from Prism Central (5.9 or above) with single click option.
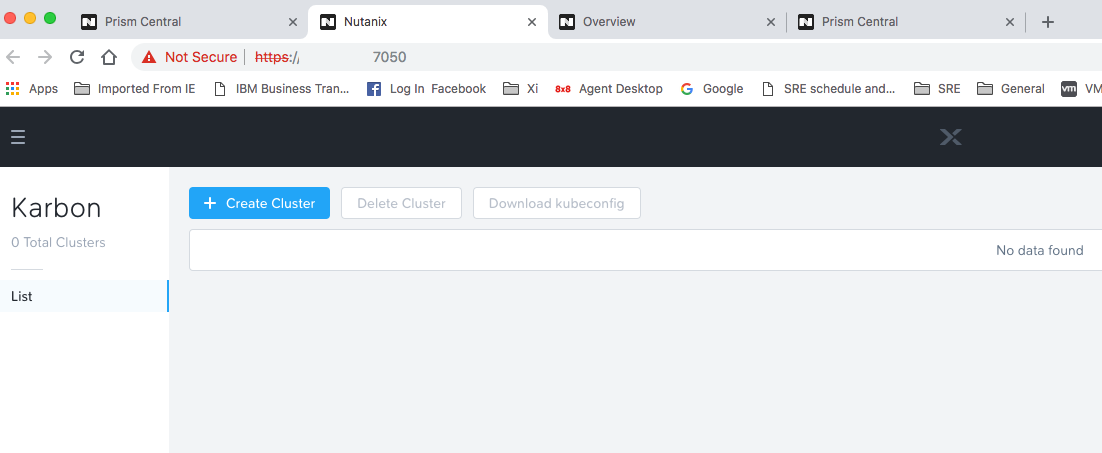
Once enabled browse the Karbon console https://prismcentralvmip:7050 using “Click here to go to Karbon Console”

Deploying a Kubernetes Cluster Create a Kubernetes cluster in the Karbon web console by configuring a Kubernetes cluster’s settings.
1. Log into the Karbon web console using your Prism credentials.
2. Click Create Cluster. The Create Cluster page appears.
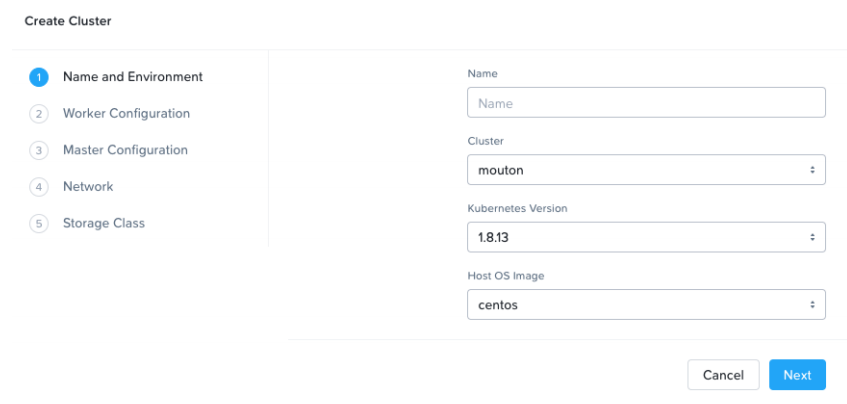
3. Do the following in the indicated fields to set up the Name and Environment:
• Name: Choose a name for your cluster. The name must start with a letter or a number followed by up to 40 lowercase or uppercase letters, numbers, or hyphens (cannot end with a hyphen).
• Cluster: Choose which Nutanix cluster you’d like to run the Kubernetes cluster on.
• Kubernetes Version: Choose from one of three Kubernetes versions (1.8.13, 1.9.6, or 1.10.3).
• Host OS Image: Select the Linux distribution of the uploaded image (centos or ubuntu).
4. Click Next. The Worker Resources page appears
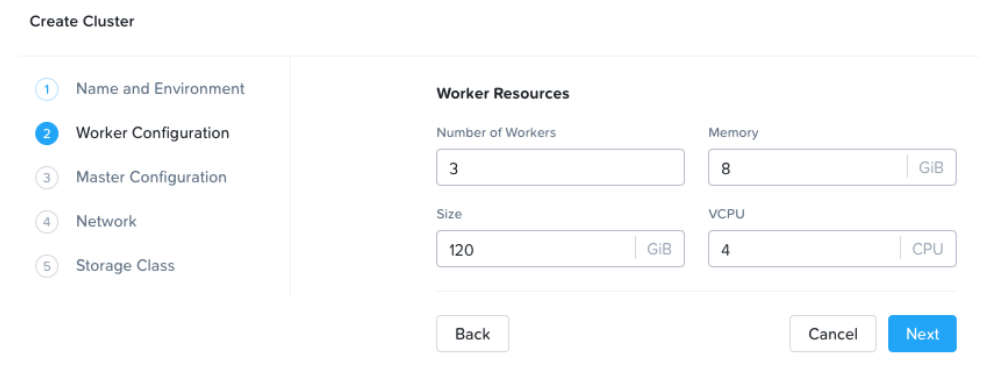
5. Do the following in the indicated fields to configure Worker Resources:
• Number of Workers: Enter the number of Kubernetes worker nodes (default is three nodes).
• Memory: Enter the memory capacity per node (recommended 8 GiB per worker node).
• Size: Enter the hard disk size (recommended 120 GiB per worker node).
• VCPU: Enter the number of vCPUs per node.
6. Click Next. The Master Configuration page appears.
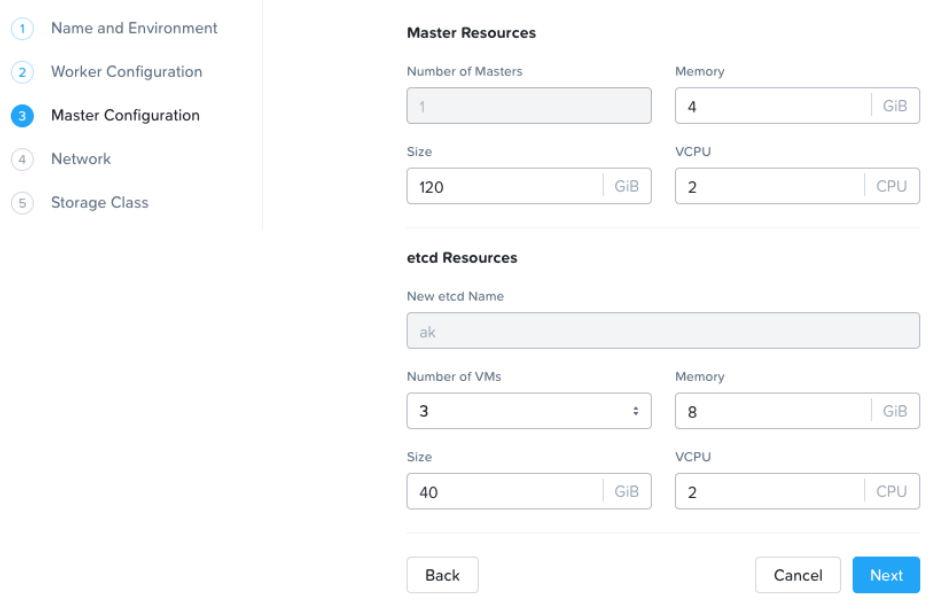
7. Do the following in the indicated fields to configure the Master Resources:
• Memory: Enter the memory capacity for the master node (recommended 4 GiB).
• Size: Enter the hard disk size for the master node (recommended 120 GiB).
• VCPU: Enter the number of vCPUs for the master node
8. Do the following in the indicated fields to configure the etcd Resources:
• Number of VMs: Select the number of etcd VMs (three recommended).
• Memory: Enter the size of etcd resources (recommended 8 GiB).
• Size: Enter the hard disk size per etcd VM.
• VCPU: Enter the number of VCPUs per etcd node.
9. Click Next. The Network page appears.
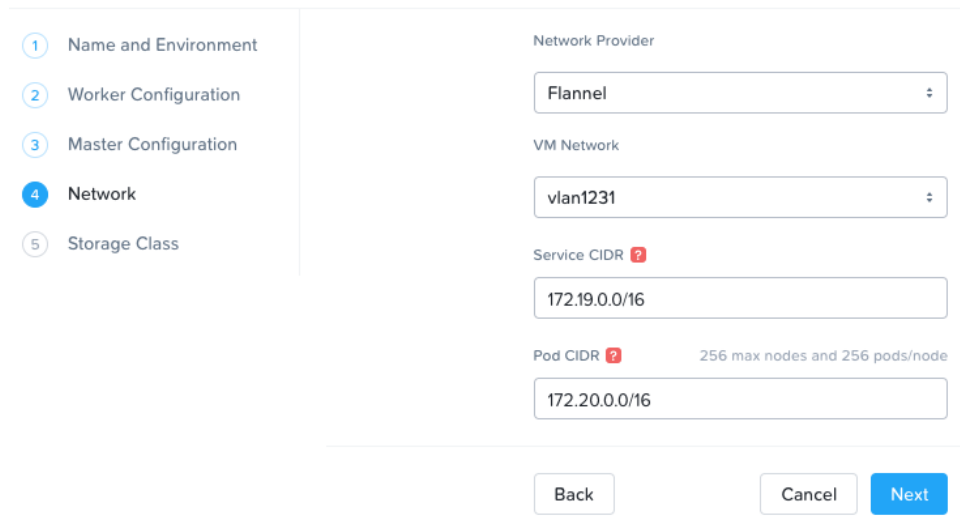
10. Do the following in the indicated fields to configure Network settings:
• Network Provider: Select the network plug-in. Currently, only Flannel is supported.
• VM Network: Choose a network for deploying the etcd, worker, and master VMs.
• Service CIDR: Enter an IP address range within your network range (RFC-1918) in CIDR notation, or use the default values. This will be the IP range on which services are exposed.
• Pod CIDR: Enter an IP address range within your network range (RFC-1918) in CIDR notation that will be used for pod-to-pod communication, or use the default values. All pods in the cluster will be assigned an IP address from this range.
11. Click Next. The Storage Class page appears.
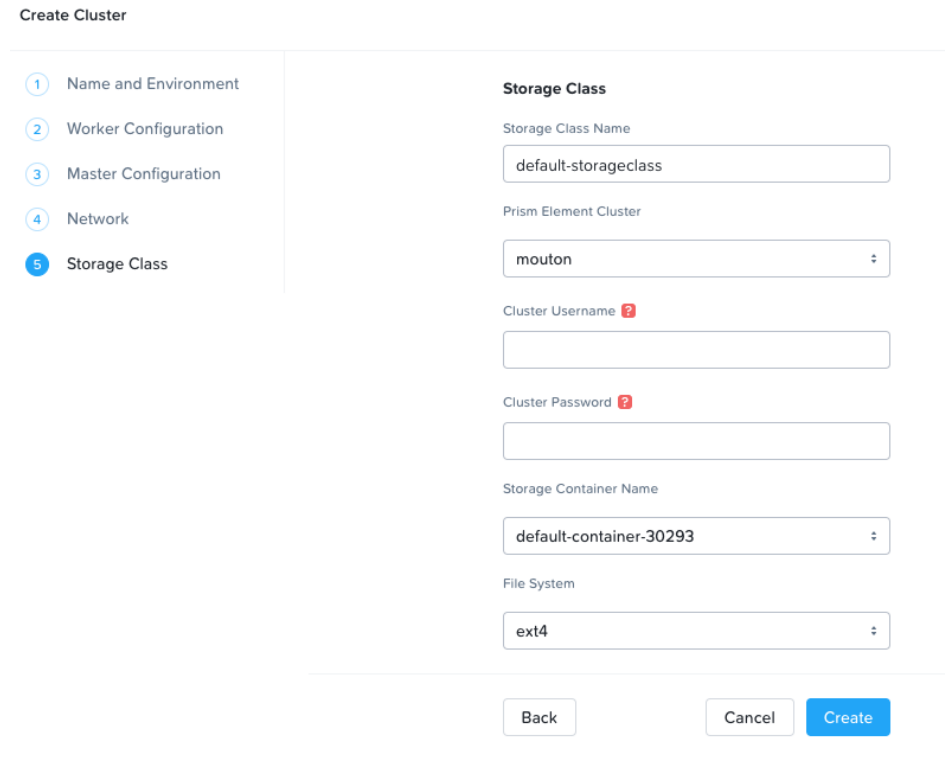
12. Do the following in the indicated fields to configure Storage Class settings:
• Storage Class Name: Enter the name for the storage class. The name must start with a letter or a number. Only lowercase alphanumeric characters, hyphens, and periods are allowed (maximum 253 characters).
• Prism Element Cluster: Select the target cluster for allocating storage for stateful pods.
• Cluster Username: Enter your Prism Element username.
• Cluster Password: Enter your Prism Element password.
• Storage Container Name: Select the storage container that will be used for the storage.
• File System: Select the file system that the storage class will use (xfs or ext4).
13. Click Create. The new cluster will appear on the Karbon home page. A progress bar will display the deployment’s progress in the Status field.
14. Hover over the Status field to display a tooltip with progress details.
“Be social and share this on social media, if you feel this is worth sharing it”