

In our last post, we laid the hardware foundation for vSphere 9.0 performance. Now it’s time to tune the hypervisor itself.
The ESXi CPU scheduler is a marvel of engineering, but understanding how it works—and how to configure it—can be the difference between a good environment and a great one.
Today, we’re kicking off our ESXi deep dive with a masterclass on CPU performance. We’ll cover:
-
✅ Right-sizing your VMs
-
✅ The truth about CPU overcommitment
-
✅ NUMA best practices
Let’s dive in. 🚀
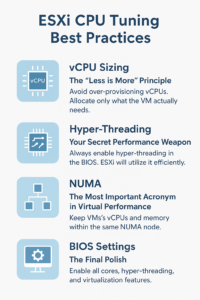
🖥️ vCPU Sizing: The “Less is More” Principle
One of the most common mistakes in the field is over-provisioning CPUs. More vCPUs doesn’t always mean better performance—in fact, it can hurt.
Why Over-Provisioning Hurts
-
Scheduling Overhead: A single-threaded workload may bounce between idle vCPUs, destroying cache locality.
-
Resource Waste: Even unused vCPUs consume host resources (timers, memory sync).
The Golden Rule
👉 Start small. Use the application vendor’s recommendation—or even just 1 vCPU—then monitor performance. Only add more if the VM is demonstrably CPU-bound.
💡 Allocate only as much as needed. Oversizing VMs is one of the fastest ways to tank cluster efficiency.
⚡ Hyper-Threading: Your Secret Performance Weapon
Hyper-threading allows one physical core to act as two logical processors, improving efficiency.
Best Practices
-
Always Enable It: If supported, turn it on in BIOS. ESXi will handle it intelligently.
-
Smart Scheduling: ESXi prefers idle cores first, then fills hyper-threads as needed.
-
Performance Boost: Gains of 10–30% are common, depending on workload.
⚠️ Caution: CPU Affinity
Don’t pin two busy vCPUs to the same physical core’s logical processors (e.g., CPU 0 & CPU 1). They’ll fight for resources and perform worse.
🧩 NUMA: The Most Important Acronym in Virtual Performance
NUMA (Non-Uniform Memory Access) is critical for modern servers. CPUs access local memory much faster than remote memory.
ESXi’s NUMA scheduler works hard to keep vCPUs and memory in the same NUMA node.
Best Practices
-
Let ESXi Handle It: Default NUMA scheduling is optimal in 99% of cases.
-
Virtual Topology (vSphere 8.0+): ESXi aligns VM core/socket layout to physical NUMA automatically.
-
Wide VMs: VMs larger than a single NUMA node may span multiple nodes. This introduces remote memory access.
vNUMA to the Rescue
For wide VMs, ESXi exposes virtual NUMA (vNUMA) to the guest OS. NUMA-aware OSes (Windows Server, Linux) can then optimize their own process and memory placement.
🛠️ Sizing with NUMA in Mind
-
Fit VMs within a single NUMA node whenever possible.
-
Example: On a 16-core NUMA system, keep VMs ≤16 vCPUs for best performance.
-
-
For wide VMs, size in multiples of the node size.
-
Example: On a 16-core NUMA system, a 32-vCPU VM is better than a 24-vCPU VM.
-
⚙️ Advanced NUMA BIOS Settings (For the Pros)
-
Snoop Mode: Controls cache-checking between processors. Options like Cluster-on-Die (COD) or Sub-NUMA Clustering (SNC) can split sockets into smaller NUMA nodes. Always follow your vendor’s guidance.
-
AMD EPYC (NPS): AMD’s “NUMA Nodes per Socket” setting matters. Since vSphere 7.0 U2, the best results usually come from leaving defaults at NPS=1.
✅ Key Takeaways
-
Don’t oversize vCPUs—less is often more
-
Always enable hyper-threading and let ESXi schedule smartly
-
Size VMs with NUMA boundaries in mind
-
Wide VMs? Rely on vNUMA for efficiency
-
Advanced BIOS tuning should follow server vendor recommendations
By mastering ESXi CPU tuning, you’ll unlock next-level performance in your vSphere 9.0 environment.
👉 Up next in the series: We’ll explore ESXi Memory Tuning and how to take advantage of vSphere 9.0’s memory tiering and optimizations.